# Manage Permission and Object
In **IAM (Identity and Access Management)**, **Permissions** and **Objects** define the core building blocks of access control.\
Administrators use this interface to define **what actions are allowed** and **which resources are protected**, forming the foundation of **Role‑Based Access Control (RBAC)** in ONEWEB.
***
### Prerequisites
Before managing permissions and objects, ensure that:
* You are logged in as an **Admin user**
* IAM access is enabled
* The target system (application) is already registered in IAM
***
### Access Permission & Object Management
#### Step 1: Open Permission Management
1. Log in to ONEWEB
2. Go to **Settings → IAM**
3. Open the **Admin** menu
4. Select **Permission**
***
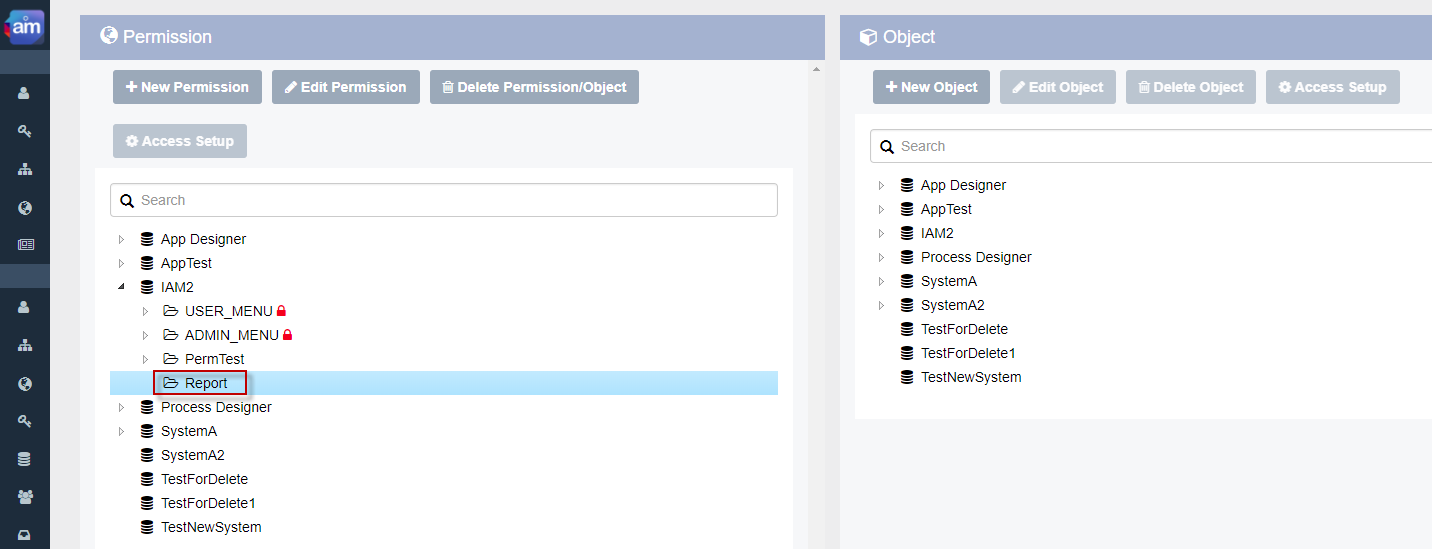
#### Understanding the Permission Screen
The permission management screen is divided into **two main panels**:
* **Left Panel** → Permission hierarchy (Permission Control)
* **Right Panel** → Object hierarchy (Object Control)
From this screen, admins can create and manage both permissions and objects.
***
### Create a New Permission
Permissions group **actions and access scope**, and are later assigned to roles.
***
#### Step 1: Open New Permission Dialog
Click **New Permission**.
***
#### Step 2: Select Target System
Choose the **System/Application** where this permission will apply.
***
#### Step 3: Select Parent Permission (Optional)
* Select an existing **parent permission** to create a hierarchy
* Or leave it empty to create a **top‑level permission**
***
#### Step 4: Define Permission Name
1. Enter **Permission Name**
2. Click **Save Permission**
***
#### Step 5: Verify Permission Creation
The new permission appears in the **Permission Tree** under the selected system.
***
### Create a New Object
Objects represent **resources that require protection** (UI elements, pages, functions, files).
***
#### Step 1: Open New Object Dialog
Click **New Object**.
***
#### Step 2: Select Target System
Choose the system where this object belongs.
***
#### Step 3: Define Object Properties
Fill in the required information:
* **Object ID** – Auto‑generated by the system
* **Object Ref ID** – Reference ID from client system
* **Object Name** – Display name
* **Object Type** – Type/category of object
* **Object Property** – Custom metadata returned to client systems
* **Access Type** – Allowed access mode
Then click **Save Object**.
***
#### Step 4: Verify Object Creation
The new object will appear in the **Object Tree** under the selected system.
***
### Best Practices
* Design permissions around **actions**, not UI elements alone
* Keep permission hierarchy shallow and meaningful
* Reuse permissions across roles
* Register objects consistently across systems
* Avoid direct user‑object mapping unless necessary
***
### Summary
Managing **Permissions and Objects** in IAM defines the enforcement layer of ONEWEB security.
Key concepts:
* Permissions define **what can be done**
* Objects define **what is protected**
* Roles bind permissions and objects together
* Users gain access through role assignment
A well‑designed permission/object model enables **secure, scalable, and compliant access governance** across ONEWEB applications.
---
# Agent Instructions: Querying This Documentation
If you need additional information that is not directly available in this page, you can query the documentation dynamically by asking a question.
Perform an HTTP GET request on the current page URL with the `ask` query parameter:
```
GET https://docs.onewebstack.com/oneweb-platform-th/building-apps/security-and-compliance/authorization-and-access-control/managing-access-control-with-iam/manage-permission-and-object.md?ask=
```
The question should be specific, self-contained, and written in natural language.
The response will contain a direct answer to the question and relevant excerpts and sources from the documentation.
Use this mechanism when the answer is not explicitly present in the current page, you need clarification or additional context, or you want to retrieve related documentation sections.