# Database Node
In **Microflow Designer**, ONEWEB provides a **Database Node** that enables Microflows to access and manipulate database data in a **controlled, service‑oriented manner**.
The Database Node acts as a dedicated activity for database interaction and supports standard operations such as:
* `SELECT` – retrieve data
* `INSERT` – create new records
* `UPDATE` – modify existing records
* `DELETE` – remove records
By using Database Nodes, database access remains encapsulated within the **process layer**, ensuring consistency with **Database Access Management** and **Data & Content Management** principles.
***
### Purpose of the Database Node
The Database Node is used when data access must:
* Be exposed as part of a Microflow service
* Follow defined business logic and process rules
* Remain independent from UI implementation
* Support reuse across Pages, Smart Forms, mobile apps, or APIs
This design ensures a clear separation between **presentation**, **process logic**, and **data storage**.
***
### Configure a Database Node in Microflow
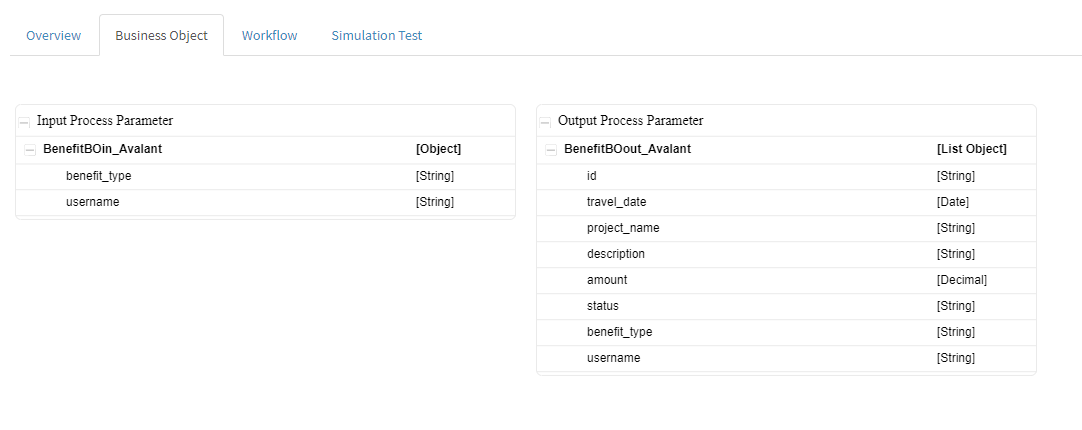
#### Step 1: Create Input and Output Process Parameters
Before adding a Database Node, define the required **Input and Output Process Parameters**.
These parameters allow:
* Passing values into the Database Node
* Receiving query results from the database
***
#### Step 2: Add the Database Node
1. Open **Microflow Designer**
2. Drag and drop the **Database Node** into the flow
3. Place the node between the **Start** and **End** nodes
4. Connect the nodes accordingly
This example shows a simple Microflow consisting only of a Database Node.
***
#### Step 3: Open Database Node Configuration
Double‑click the Database Node to open the configuration panel.
***
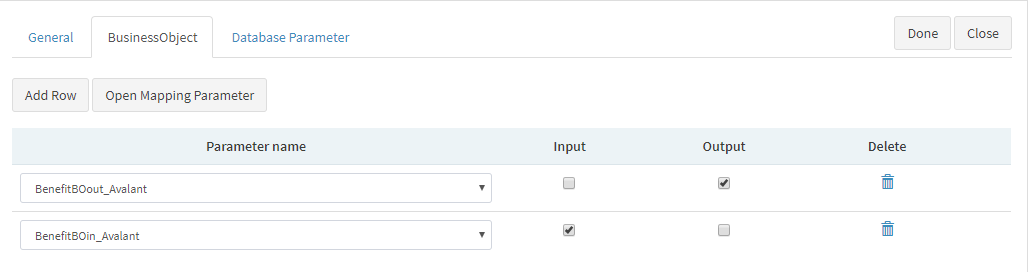
#### **Business Object Mapping**
1. Open the **BusinessObject** tab
2. Select the appropriate **Business Object** for:
* Input data mapping
* Output data mapping
This defines how process data is exchanged with the database.
***
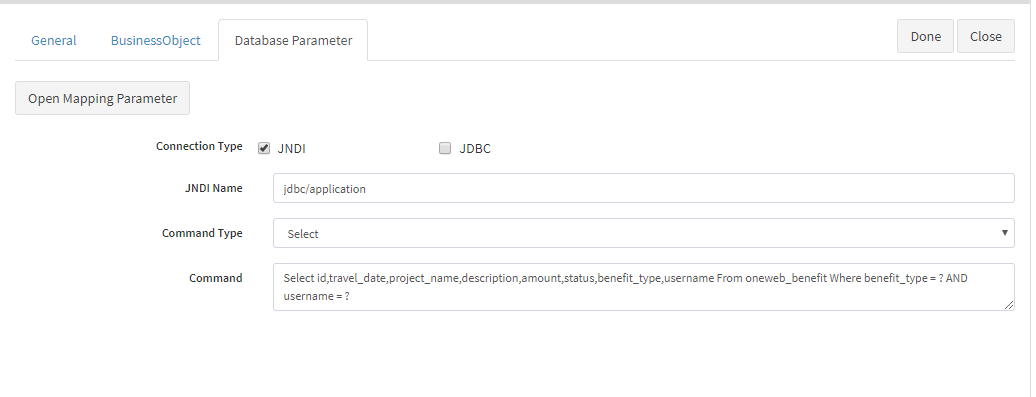
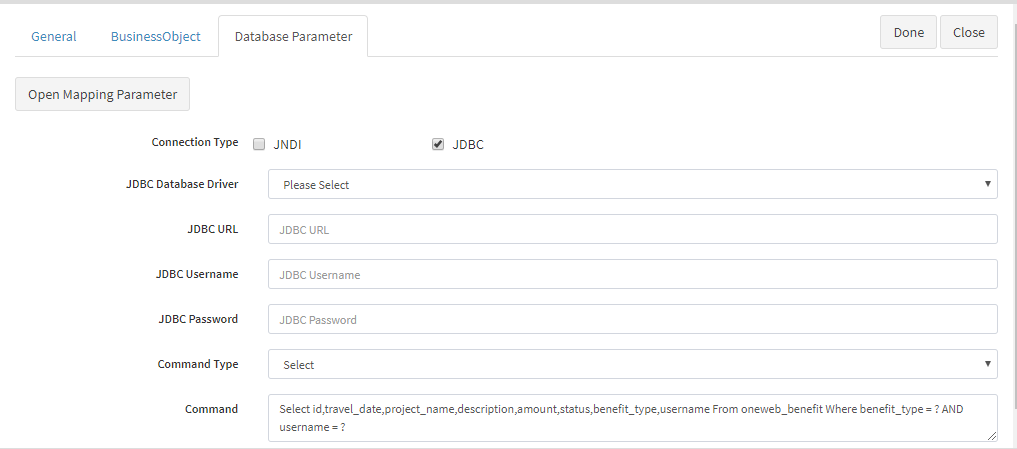
#### **Database Connection Configuration**
Open the **Database Parameter** tab to configure how the Database Node connects to the database.
ONEWEB supports two connection options:
**JNDI Connection**
* Recommended for managed, server‑side environments
* Uses predefined application server data sources
**JDBC Connection**
* Used for direct JDBC configurations
* Suitable for custom or external database connections
***
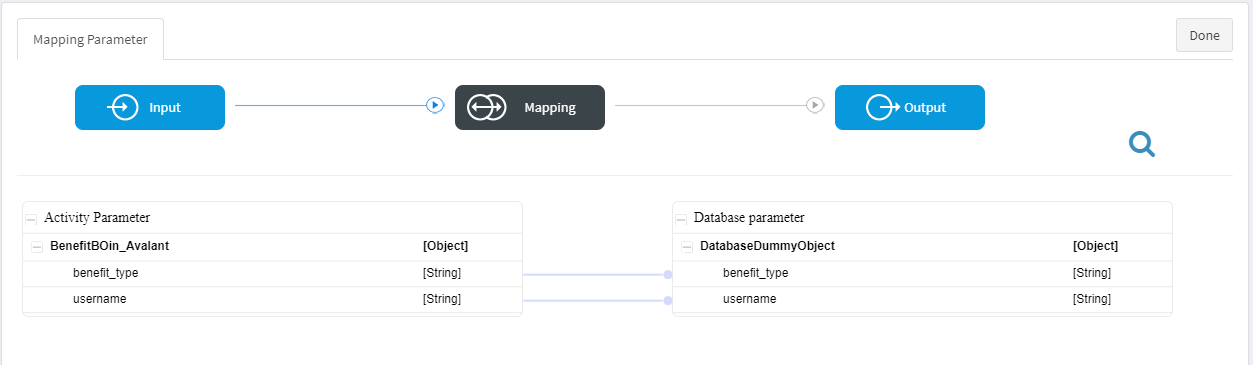
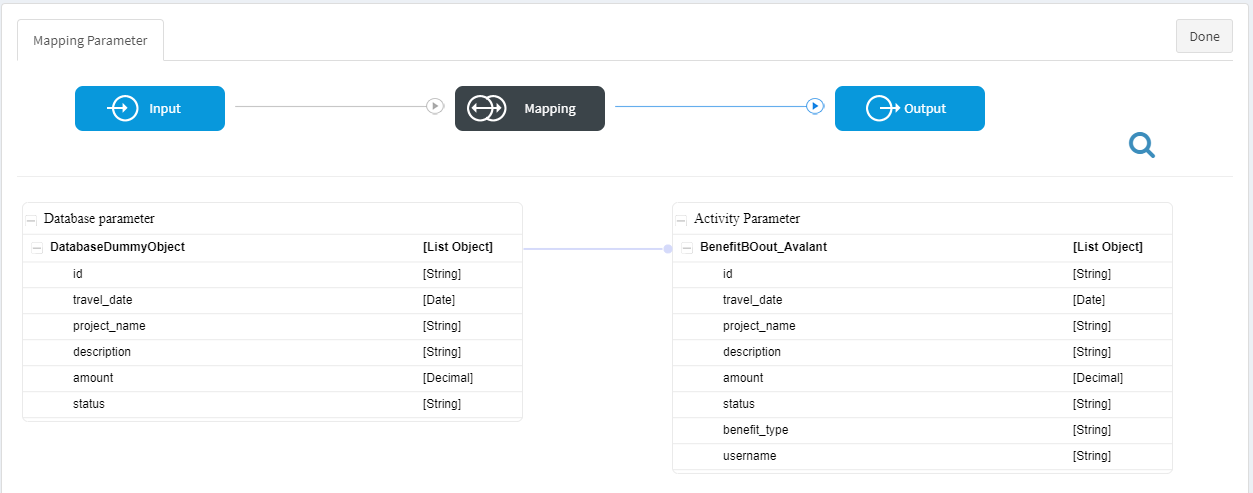
#### Step 4: Map Activity Parameters
Map **Process Activity Parameters** to **Database Parameters** for both input and output.
This step ensures:
* Input values are correctly passed to the database query
* Query results are returned to the Microflow
***
#### Step 5: Save the Microflow
Save the Microflow configuration after completing the Database Node setup.
***
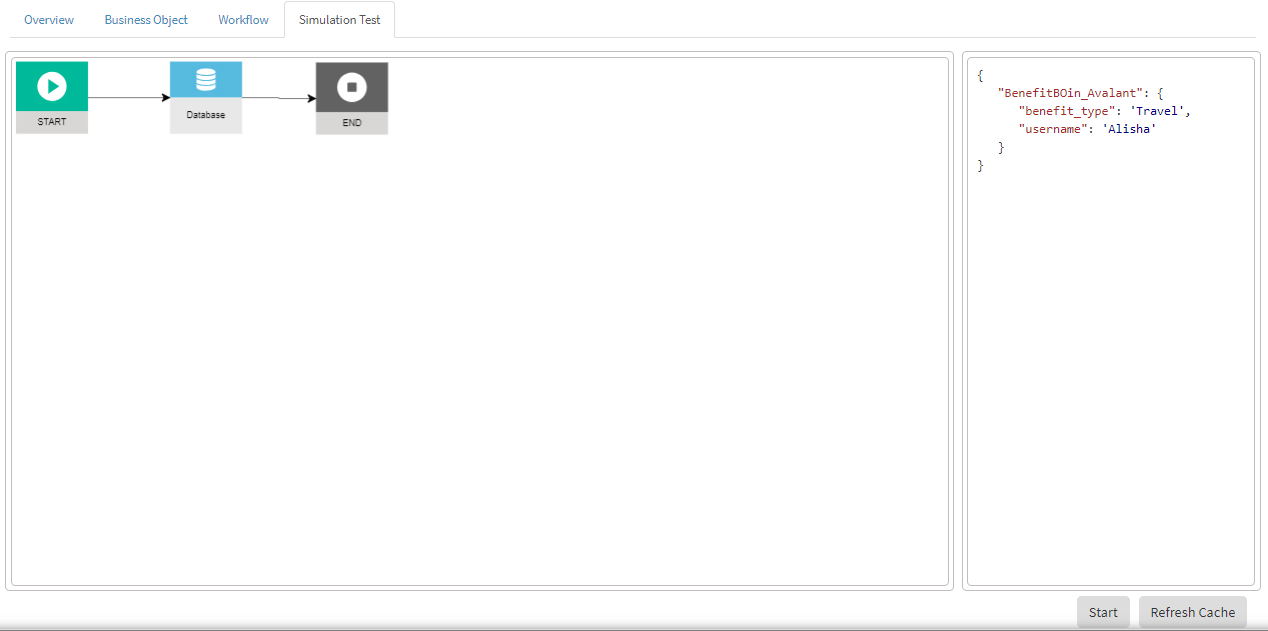
### Test Database Node Using Simulator
ONEWEB provides a **Simulator Utility** to verify database access before deployment.
#### Execute Simulation
1. Open the **Simulator**
2. Enter required input values
3. Click **Start** to execute the Microflow
***
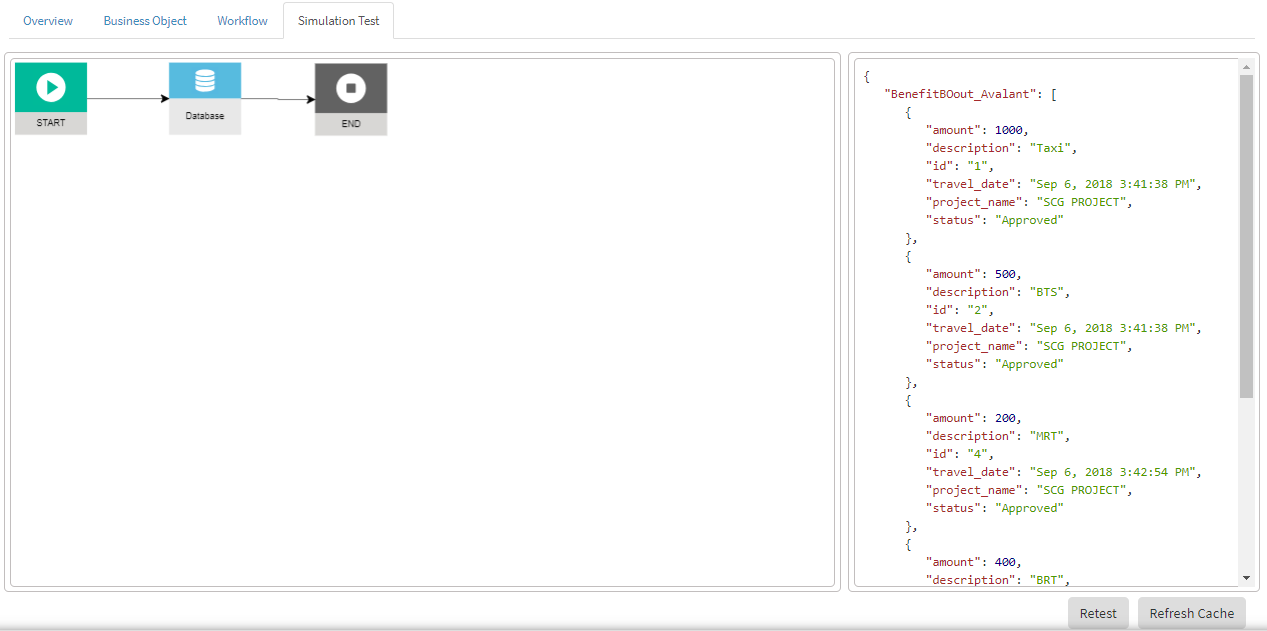
#### View Database Query Results
The Database Node retrieves data from the database and displays the results in the simulator output.
***
### Summary
The **Database Node** is a core building block for **Microflow‑based database access** in ONEWEB.
By using Database Nodes, applications can:
* Access databases through structured Microflows
* Expose database operations as reusable services
* Enforce business logic and governance at the process level
* Keep UI layers independent from database implementation
* Safely support enterprise‑scale data access patterns
This makes the Database Node a fundamental component of effective **Database Access Management** and **Data & Content Management** in ONEWEB.
---
# Agent Instructions: Querying This Documentation
If you need additional information that is not directly available in this page, you can query the documentation dynamically by asking a question.
Perform an HTTP GET request on the current page URL with the `ask` query parameter:
```
GET https://docs.onewebstack.com/oneweb-platform-th/building-apps/data-and-content-management/database-access-management/database-access-from-microflow/database-node.md?ask=
```
The question should be specific, self-contained, and written in natural language.
The response will contain a direct answer to the question and relevant excerpts and sources from the documentation.
Use this mechanism when the answer is not explicitly present in the current page, you need clarification or additional context, or you want to retrieve related documentation sections.