# Dynamic Image

**Dynamic Image** allows images to be loaded and displayed dynamically on a page based on data retrieved from a database or other data sources.\
In ONEWEB **Page Designer**, this capability is commonly implemented by integrating **Image components** with **Microflows**.

* **Web Applications**: Images are typically loaded via Microflows from a database
* **Mobile Applications**: Images can be loaded directly from **local storage**, without requiring Microflows

This feature is useful for displaying:

* User profile pictures
* Product images
* Document previews
* Any image content stored dynamically in a database

***

### Web Application: Load Image from Database Using Microflow

To display an image dynamically in a **web page**, a Microflow is used to retrieve image data from the database and bind it to an Image component.

***

#### Step 1: Create a Business Object

First, create a **Business Object (BO)** to hold the image data retrieved from the database.

<figure><img src="https://2015371994-files.gitbook.io/~/files/v0/b/gitbook-x-prod.appspot.com/o/spaces%2FMpDjHWFRUtZ5nJcSfVXd%2Fuploads%2FHvbk1zBQHr4Fxxfuy8ky%2Fimage.png?alt=media" alt=""><figcaption></figcaption></figure>

<p align="center"><em>
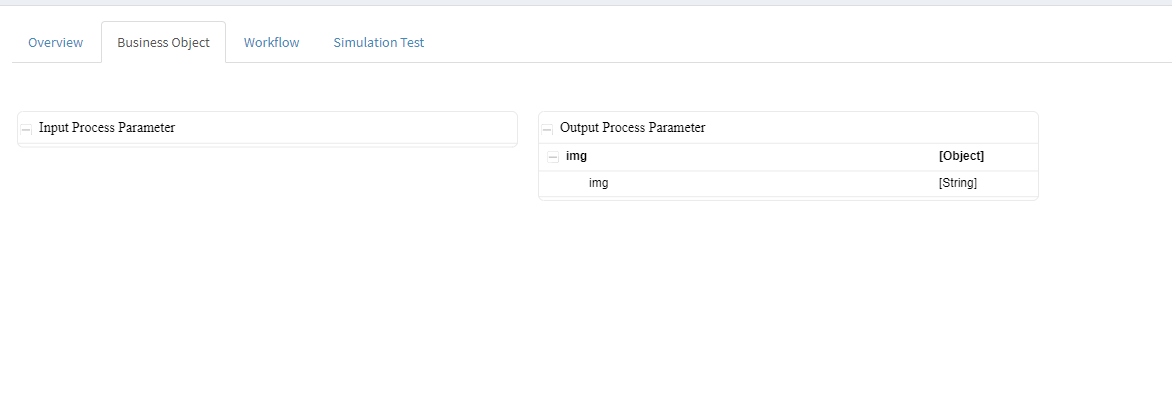
Create Business Object</em></p>

***

#### Step 2: Design the Microflow

Drag and drop the following nodes into the Microflow canvas:

* **Start Node**
* **Database Node**
* **End Node**

Then connect them in sequence as shown below.

<figure><img src="https://2015371994-files.gitbook.io/~/files/v0/b/gitbook-x-prod.appspot.com/o/spaces%2FMpDjHWFRUtZ5nJcSfVXd%2Fuploads%2F9r3l1eIwyeSmX2OfgLD2%2Fimage.png?alt=media" alt=""><figcaption></figcaption></figure>

<p align="center"><em>
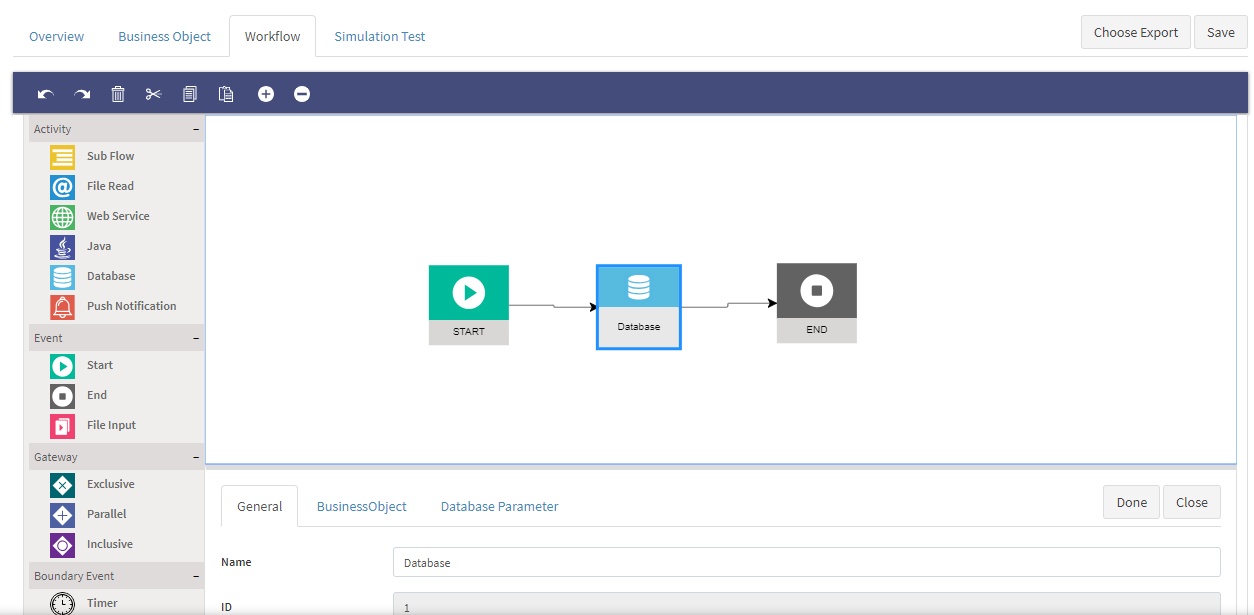
Microflow with Start, Database, and End nodes</em></p>

***

#### Step 3: Configure Database Node Output

1. Double‑click the **Database Node**
2. Open the **BusinessObject** tab
3. Enable the **Output** checkbox

<figure><img src="https://2015371994-files.gitbook.io/~/files/v0/b/gitbook-x-prod.appspot.com/o/spaces%2FMpDjHWFRUtZ5nJcSfVXd%2Fuploads%2FNGKEN5ZbZgVr4uhMpTwu%2Fimage.png?alt=media" alt=""><figcaption></figcaption></figure>

<p align="center"><em>Enable Output in BusinessObject tab</em></p>

***

#### Step 4: Configure Database Query (Base64 Image)

1. Open the **Database Parameter** tab
2. Enter the SQL command to retrieve image data
3. Ensure the image data is retrieved as **Base64‑encoded string**

Example logic (conceptual):

* Retrieve binary image data
* Encode as Base64
* Prefix with MIME type

<figure><img src="https://2015371994-files.gitbook.io/~/files/v0/b/gitbook-x-prod.appspot.com/o/spaces%2FMpDjHWFRUtZ5nJcSfVXd%2Fuploads%2F0wifiaCcKcaTM96fpCYz%2Fimage.png?alt=media" alt=""><figcaption></figcaption></figure>

<p align="center"><em>
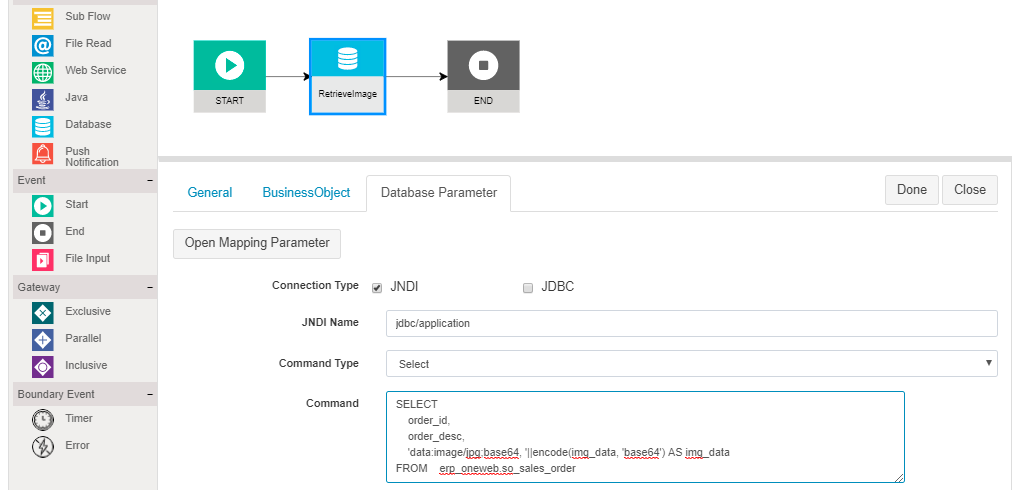
Database parameter and mapping configuration</em></p>

{% hint style="info" %}
**Note:**\
When retrieving image data from the database, ensure it is returned as a **Base64‑encoded string**\
(e.g. `data:image/jpg;base64,...`).\
The image is handled as a **String variable** inside the Microflow.
{% endhint %}

***

#### Step 5: Map Database Output to Business Object

1. Open **Mapping Parameter**
2. Map `DatabaseDummyObject` to the Activity Business Object
3. Link mapping output correctly
4. Click **Done**

<figure><img src="https://2015371994-files.gitbook.io/~/files/v0/b/gitbook-x-prod.appspot.com/o/spaces%2FMpDjHWFRUtZ5nJcSfVXd%2Fuploads%2F6wm4TOsxMJ1reBg5Zocw%2Fimage.png?alt=media" alt=""><figcaption></figcaption></figure>

<p align="center"><em>
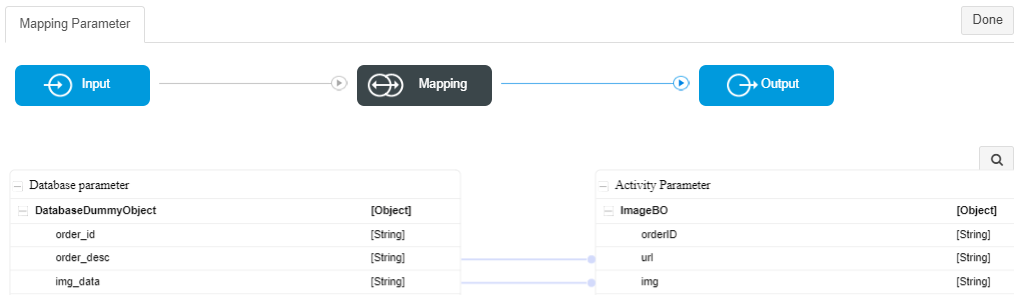
Mapping Database output to Business Object</em></p>

***

### Display Image on Page UI Using Microflow

Once the Microflow is ready, bind it to the Image component in Page Designer.

***

#### Step 6: Add Image Component to Page

1. Open the page in **Page Designer**
2. Drag and drop the **Image component** onto the canvas

<figure><img src="https://2015371994-files.gitbook.io/~/files/v0/b/gitbook-x-prod.appspot.com/o/spaces%2FMpDjHWFRUtZ5nJcSfVXd%2Fuploads%2FvtqWxIjhci88GlsJEtuD%2Fimage.png?alt=media" alt=""><figcaption></figcaption></figure>

<p align="center"><em>
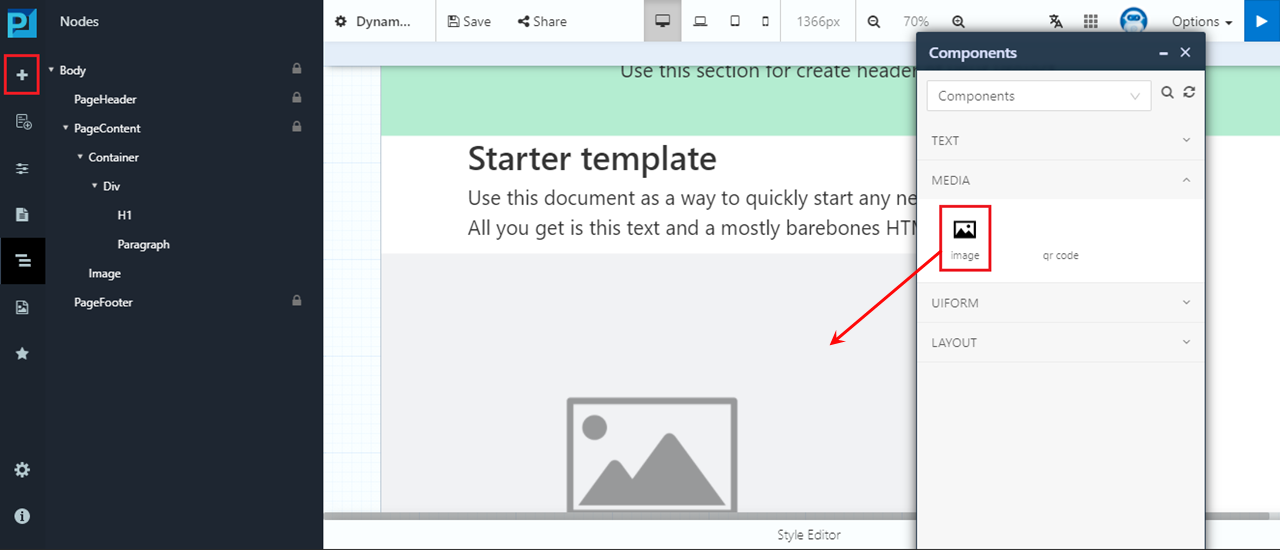
Add Image component to page</em></p>

***

#### Step 7: Attach Microflow to Page Load Event

1. Select **PageContent** from the Page Structure panel
2. Open the property configuration popup
3. Click the **Action** icon

<figure><img src="https://2015371994-files.gitbook.io/~/files/v0/b/gitbook-x-prod.appspot.com/o/spaces%2FMpDjHWFRUtZ5nJcSfVXd%2Fuploads%2F2yHDlrXMXTgWsPcr08Am%2Fimage.png?alt=media" alt=""><figcaption></figcaption></figure>

<p align="center"><em>
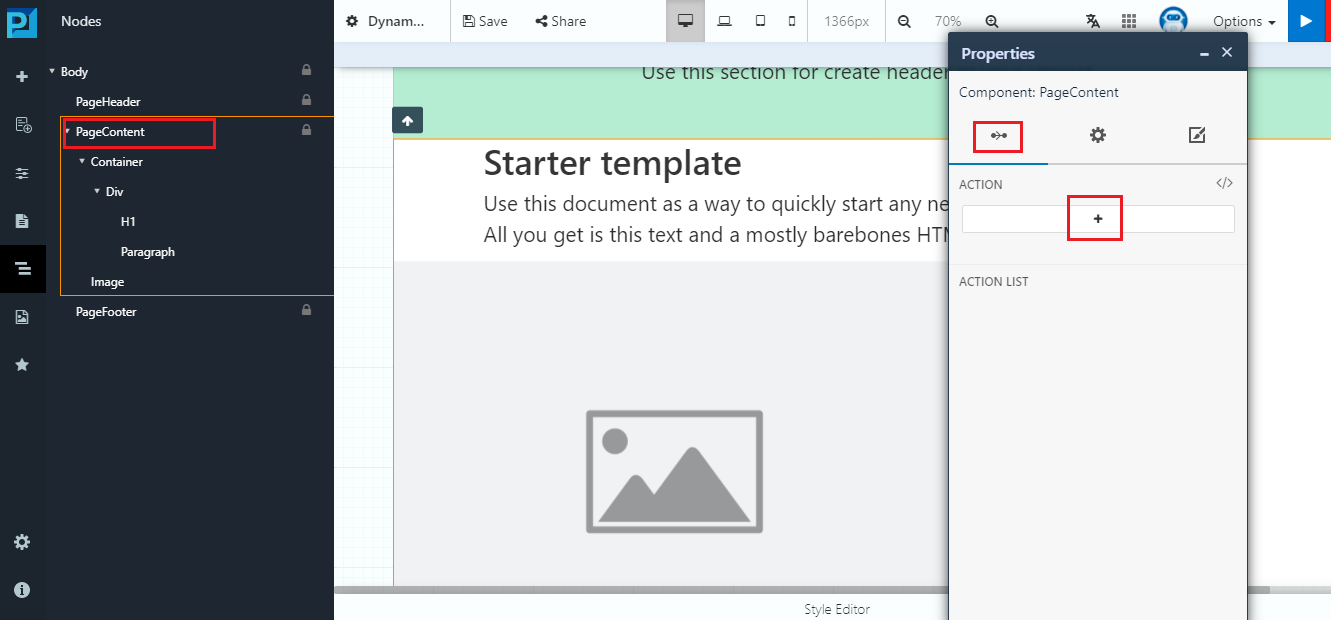
Open PageContent action configuration</em></p>

4. Click **Add Action List (+)**
5. Select:
   * **Type:** Microflow
   * **Event:** Load
   * Choose the Microflow created earlier
6. Click **Save**

<figure><img src="https://2015371994-files.gitbook.io/~/files/v0/b/gitbook-x-prod.appspot.com/o/spaces%2FMpDjHWFRUtZ5nJcSfVXd%2Fuploads%2FDeZJZCy6X5w7e9avftNN%2Fimage.png?alt=media" alt=""><figcaption></figcaption></figure>

<figure><img src="https://2015371994-files.gitbook.io/~/files/v0/b/gitbook-x-prod.appspot.com/o/spaces%2FMpDjHWFRUtZ5nJcSfVXd%2Fuploads%2FJpETXmRH5YL3wxTWfeG3%2Fimage.png?alt=media" alt=""><figcaption></figcaption></figure>

<p align="center"><em>
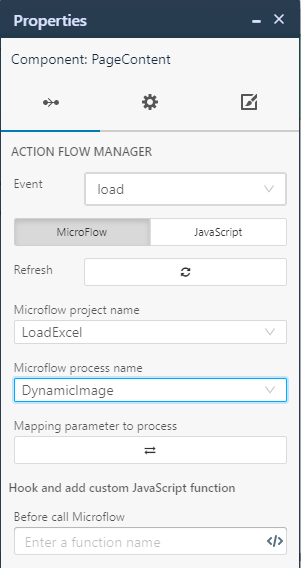
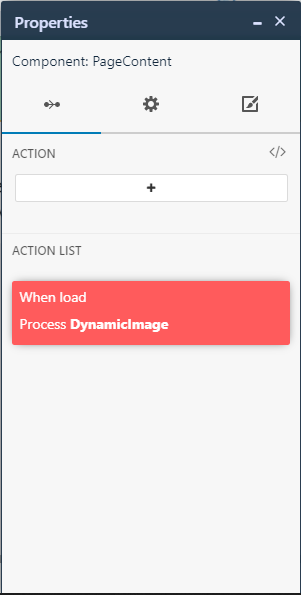
Configure Microflow action on Page Load</em></p>

***

#### Step 8: Bind Image Component to Microflow Data

1. Select the **Image component**
2. Click the **Data Binding** icon
3. Choose **Connect to Data**
4. Select:
   * Microflow
   * Business Object
   * Image field

<figure><img src="https://2015371994-files.gitbook.io/~/files/v0/b/gitbook-x-prod.appspot.com/o/spaces%2FMpDjHWFRUtZ5nJcSfVXd%2Fuploads%2FmVZV49AkuTTWaTlDfm1i%2Fimage.png?alt=media" alt=""><figcaption></figcaption></figure>

<p align="center"><em>
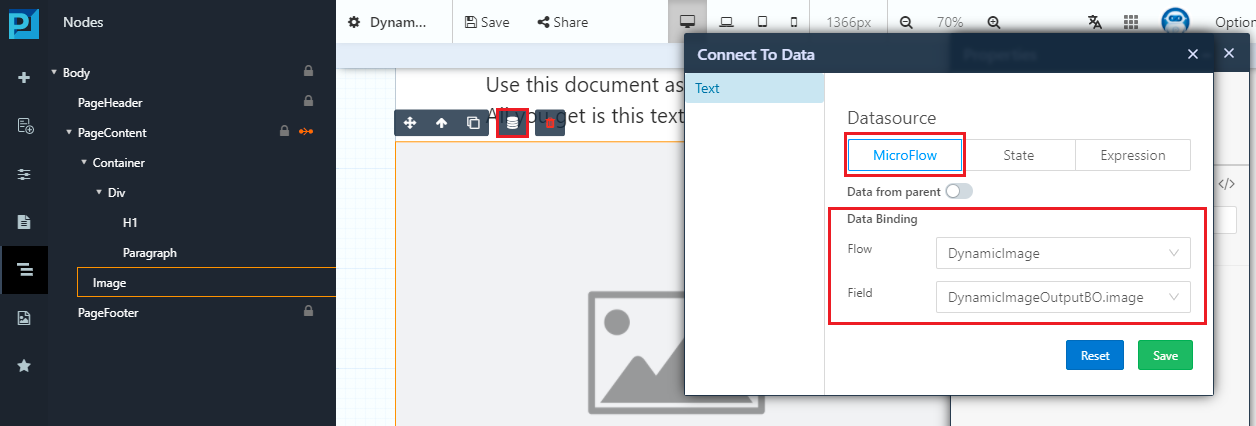
Bind Image component to Microflow data</em></p>

***

#### Step 9: Build and Verify Output

Build your application and preview the page to verify that the image is displayed correctly.

<figure><img src="https://2015371994-files.gitbook.io/~/files/v0/b/gitbook-x-prod.appspot.com/o/spaces%2FMpDjHWFRUtZ5nJcSfVXd%2Fuploads%2F4PzQpmX6Txge3v0oTpnD%2Fimage.png?alt=media" alt=""><figcaption></figcaption></figure>

<p align="center"><em>
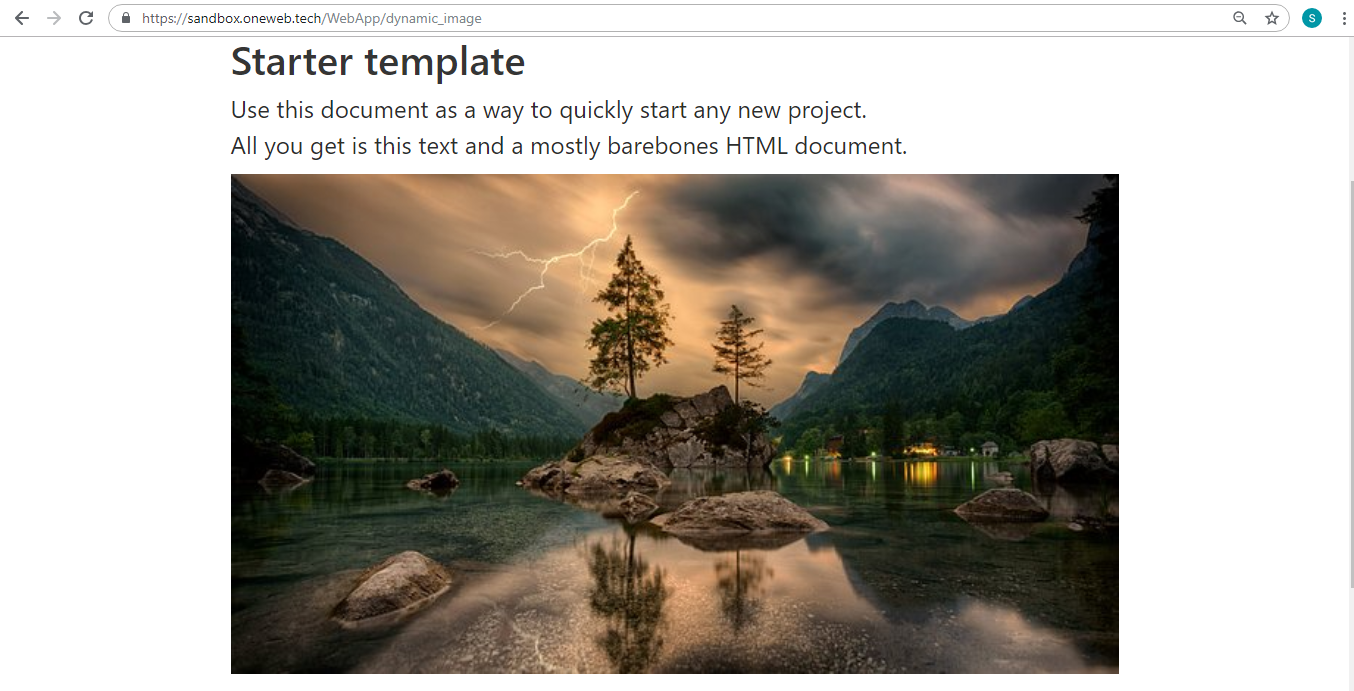
Dynamic image displayed on page</em></p>

***

### Mobile Application Note

For **mobile applications**, Dynamic Image loading can be implemented using **local storage** instead of Microflows.\
This approach improves performance and reduces backend dependency.

* &#x20;Refer to: *Local Storage in Page* section for mobile‑specific implementation.

***

### Design Perspective

As part of **Page Designer best practices**:

* Use Microflows for dynamic image loading in web apps
* Ensure images are optimized and Base64‑encoded correctly
* Prefer local storage for mobile image handling
* Avoid loading large images unnecessarily on page load

Dynamic Image support enables rich, data‑driven visual experiences on ONEWEB pages.


---

# Agent Instructions: Querying This Documentation

If you need additional information that is not directly available in this page, you can query the documentation dynamically by asking a question.

Perform an HTTP GET request on the current page URL with the `ask` query parameter:

```
GET https://docs.onewebstack.com/building-apps/ui-page-designer/ux-ui-components/pages/page-features/dynamic-image.md?ask=<question>
```

The question should be specific, self-contained, and written in natural language.
The response will contain a direct answer to the question and relevant excerpts and sources from the documentation.

Use this mechanism when the answer is not explicitly present in the current page, you need clarification or additional context, or you want to retrieve related documentation sections.
