# Component Extension
**Component Extensions** allow developers to extend ONEWEB **Page Designer** with **custom, user‑defined UI components**.\
This feature enables teams to introduce new UI elements beyond the default component set, similar to how the **ChartJS extension** works—but with the flexibility for **anyone to develop and package their own component**.
Key characteristics:
* Extensions are packaged as `.pgx` files
* Extensions can be **web‑specific** or **mobile‑specific**
* Once installed, components appear as native elements inside Page Designer
Component Extensions are ideal for:
* Custom tables or editors
* Specialized visual components
* Industry‑specific UI elements
* Reusable advanced components not available by default
***
### Add a Component Extension to an Application
#### Step 1: Open Extension Settings
1. Open the **Application** in Page Designer
2. Go to the **SETTINGS** tab
***
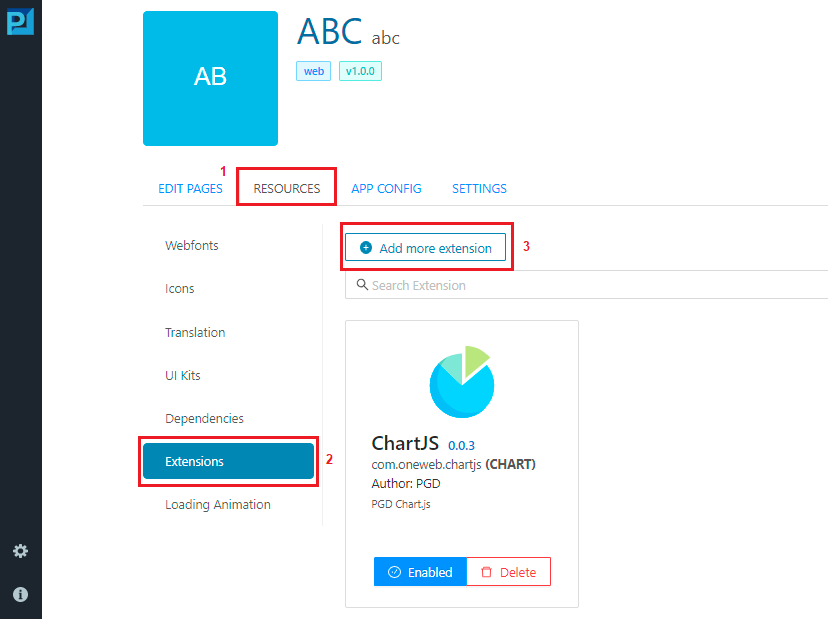
#### Step 2: Open Extensions Manager
1. Click **EXTENSIONS**
2. Click **Add more extensions**
***
#### Step 3: Upload Extension Package
1. Drag & drop your **`.pgx` extension file**\
**or**
2. Click **Choose File** and browse for the extension file
***
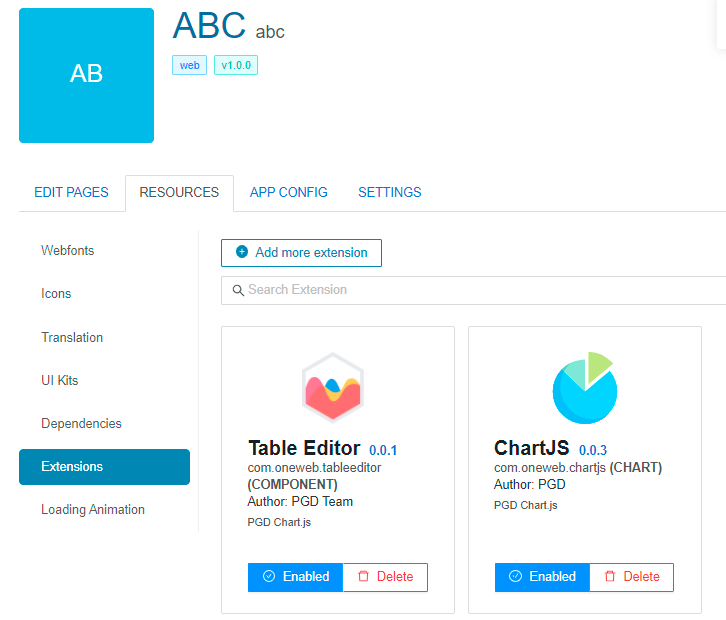
#### Step 4: Install the Extension
1. Click **Install** for the uploaded extension\
\&#xNAN;*(In this example, a **Table Editor** extension is installed)*
2. Close the installation window
Ensure the extension is **enabled** for the application.
***
### Use Component Extension on a Page
#### Step 5: Add Extension Component to Page
1. Open the page where you want to use the component
2. Locate the extension’s panel (e.g. **Table Editor**)
3. Drag and drop the extension component onto the design canvas
***
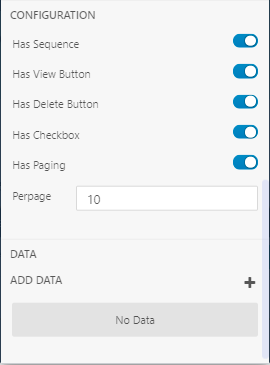
#### Step 6: Configure Component Properties
1. Select the extension component
2. Open the **Properties** tab
3. Configure settings specific to the component
***
#### Step 7: Add or Configure Data
Depending on the extension, users can:
* **Add static data**
* Configure display or behavior options
***
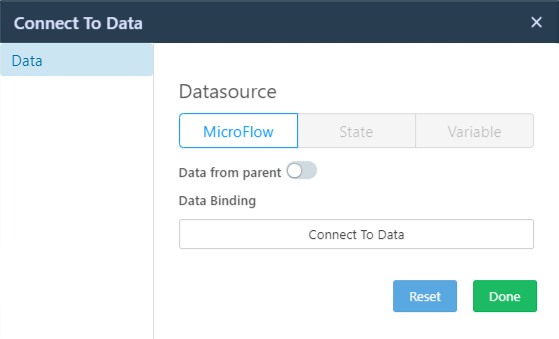
#### Step 8: Bind Dynamic Data from Microflow
Many Component Extensions support **dynamic data binding**.
1. Click the **Connect to Data** icon
2. Bind the component to **Microflow output**
***
### Build and Preview
1. Save the page
2. Build the application
3. Run the page to view **real‑time data from Microflow output**
The extension component behaves like a native Page Designer element at runtime.
***
### Design Perspective
As part of **Page Designer advanced best practices**:
* Use Component Extensions for **reusable, complex UI needs**
* Clearly document required data structures for each extension
* Test extensions across supported platforms (Web / Mobile)
* Prefer extensions over heavy custom JavaScript
* Manage extension versions carefully
Component Extensions make ONEWEB **highly extensible**, enabling teams to build tailored UI experiences while maintaining low‑code productivity.
---
# Agent Instructions: Querying This Documentation
If you need additional information that is not directly available in this page, you can query the documentation dynamically by asking a question.
Perform an HTTP GET request on the current page URL with the `ask` query parameter:
```
GET https://docs.onewebstack.com/building-apps/ui-page-designer/ux-ui-components/pages/page-features/component-extension.md?ask=
```
The question should be specific, self-contained, and written in natural language.
The response will contain a direct answer to the question and relevant excerpts and sources from the documentation.
Use this mechanism when the answer is not explicitly present in the current page, you need clarification or additional context, or you want to retrieve related documentation sections.